Purple Martin Pages
![]() Requirements for martins
Requirements for martins
![]() The Martin Bio
Page
The Martin Bio
Page![]() The Habits
Page
The Habits
Page![]() Tips to
Attract Them
Tips to
Attract Them
![]() Nest
Checks
Nest
Checks
![]() T-14
Mounting
T-14
Mounting![]() Purple Martin
Housing
Purple Martin
Housing
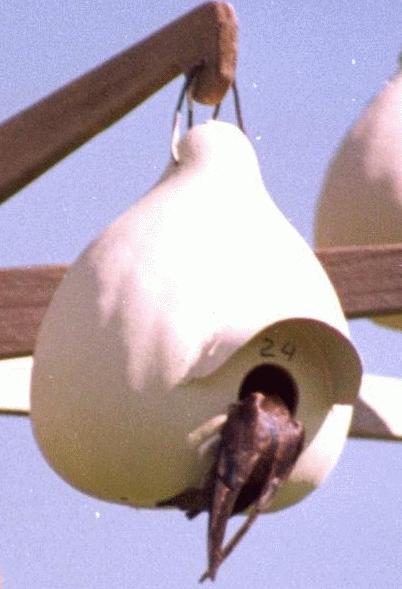
Access Doors & Canopies
Access Holes & Canopies
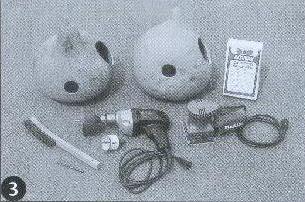
Special Note: I was able to purchase1/2 gallon jars by the dozen from Western Plastics Inc in Phoenix, Ar. Ph (602)-253-1163 Ask for Toni, she knows all about it now. I found these to work just great and the bottoms of the jars can be used to make the plastic canopies shown below. The following pictorial, (scanned from the
Update), depicts the steps to make and then add the canopies
and screw-on access doors to your gourds.
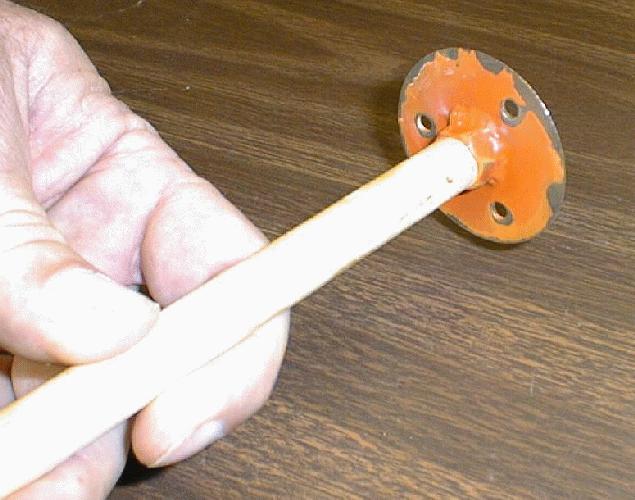
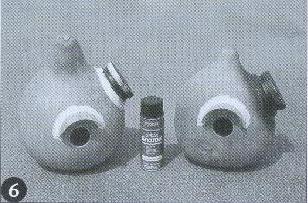
First, carefully cut the top and neck off of one of
the jars. To do this, start the cut with the scalpel or razor blade,
then finish it with scissors. Do this at the point where the round
part of the neck meets the flat side of the jar, about 1 inch below
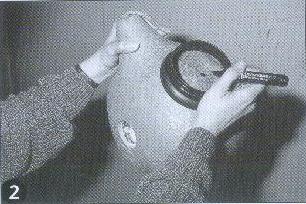
the cap as indicated by the dotted line in Picture 1. Now remove the
cover from the neck and set the newly cut portion against the right
side of the gourd. Using a marker, draw a circle on the gourd on the
inside of the neck. (Picture 2). Now replace the cover so paint
doesn't get on the threads, and, using a fast drying enamel paint,
paint both the insides and outsides of the cap and neck, then set
aside and let dry,
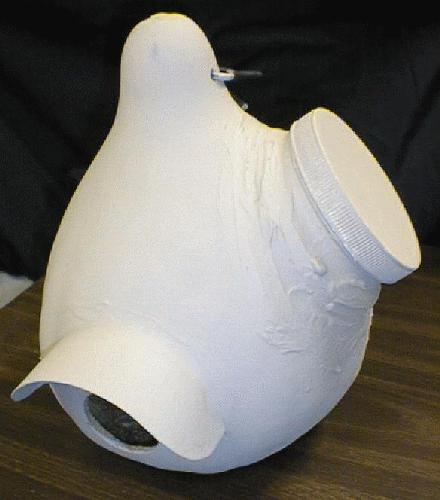
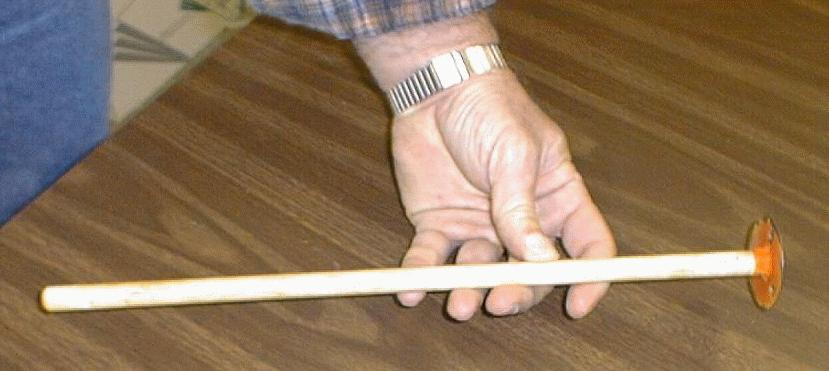
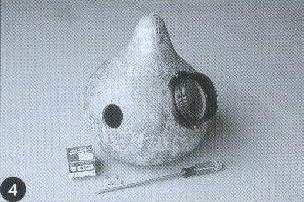
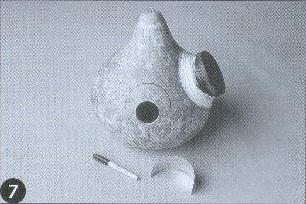
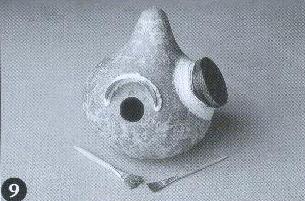
Now drill or cut the hole in your gourd for the access
door. It should be about 4" in diameter. (Picture 3). Center the jug
neck over the hole, and using a small drill, make 3 or 4 pilot holes
in the jug neck and gourd. Then attach the cap using 1/2" long, #8
wood screws. Don't over tighten and strip the screw in the gourd.
(Picture 4).
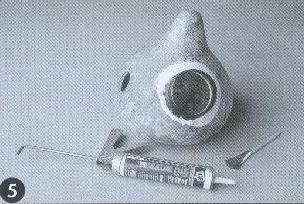
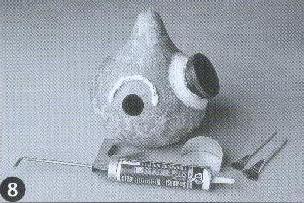
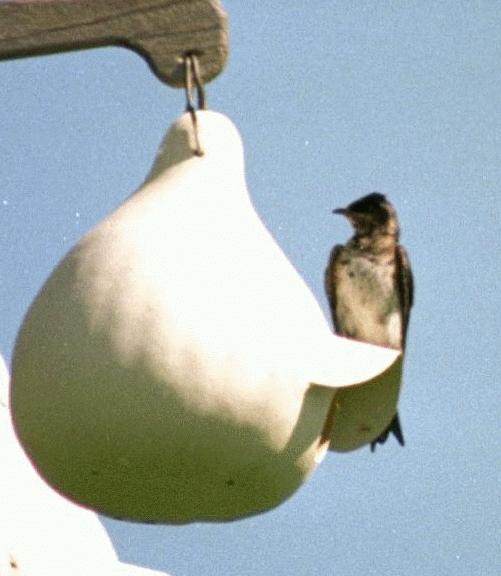
Using 100% silicone caulking, (DAP 100% silicone
caulking or it's equivalent is recommended), apply a 1/2" thick bead
around the edge of the jug neck where it meets the gourd. Using a
brush, smooth the caulking (I used my finger and it worked just
fine), being sure to cover the screw heads. (Pictures
5).
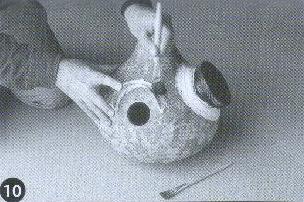
Now, following the line, add a good 1/2" thick bead of
caulking to the gourd, (Picture 8), then push the straight edge of
the canopy into the caulking, (Picture 9),
and smooth with a small brush. (Picture 10). (I used
my finger and got very good results here too). It's sticky, so take
your time and be sure and have some paper towels handy. Once you get
it to your liking, set aside to dry for 24 hours.
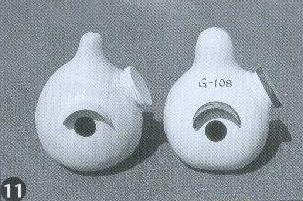
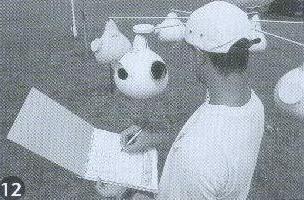
Once dry, they can be painted with a good quality
paint. (Picture 11). (See Painting Gourds below). This now
allows you to have full access to your gourds so you can do your
nest checks, pest and parasite control or whatever else you have to
do in them. (Picture 12).
|

| 
|  |
| Good place to sit | Good place to hang out | Good place to sing from |
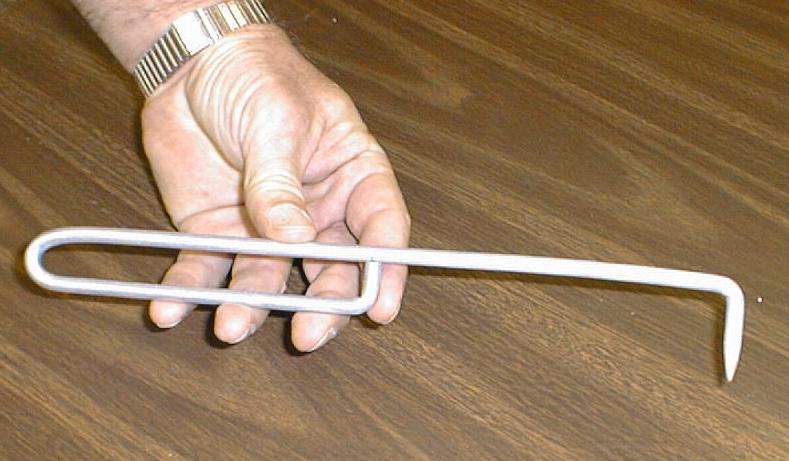
The canopies are made from thin sheet aluminum.
They can be made from what is known as 'flashing'. You won't need
much, so don't go and buy a whole roll just to make a few canopies.
If you don't have any, any local housing or roofing contractor
usually has some and they will cut you a couple of feet off of a
roll. Shouldn't cost you much more than $1.00 per foot. He may even
give it to you if you tell him what your going to do with it. Then
you use some tin snips and cut the metal to the dimensions
indicated.
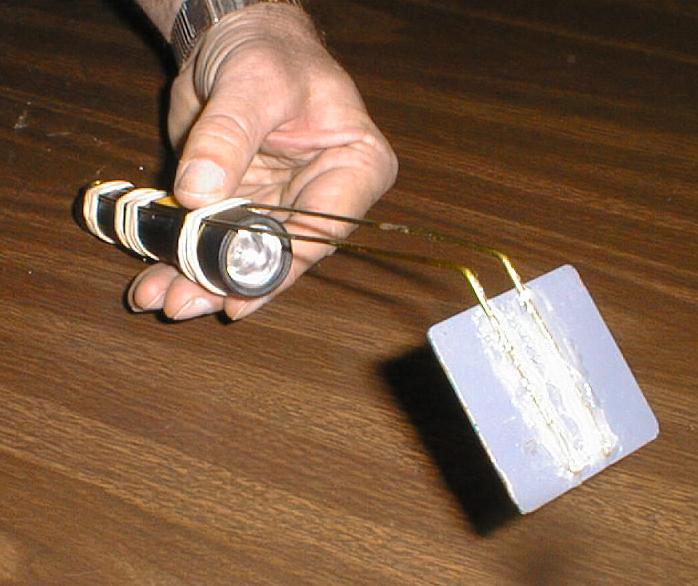
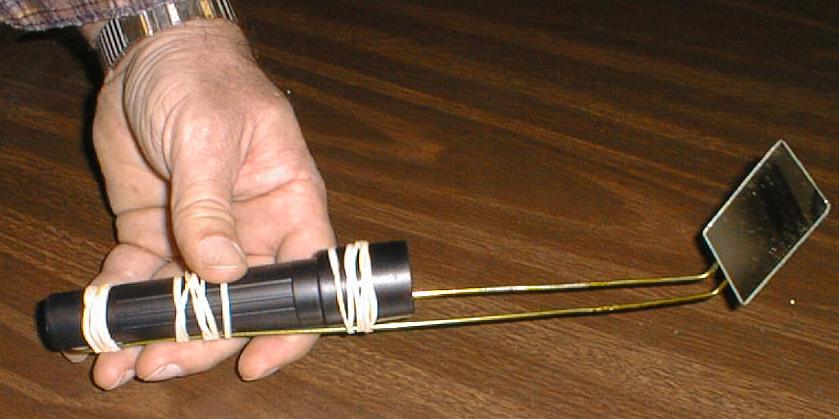
The canopies are made from pieces that are 6" long x
2" wide with a radius on two corners on one side. (See picture 7).
Be careful. Sheet metal is sharp and will cut you, so use the proper
precautions when working with it, then sand the edges to remove any
burrs and sharp edges. Employing a can of vegetables, (approximately
one pound sized can), use the edge of the top, draw the two radiused
corners with a marker and cut them off. Now form the canopies by
bending them around the can of vegetables. This will give you the
approximate shape you need, then you can finish shaping it from
there.
Canopies and 1/2 gal jars can also be ordered from the
PMCA's Martin Marketing Place.
Email =
PMCA@edinboro.edu
Another Idea
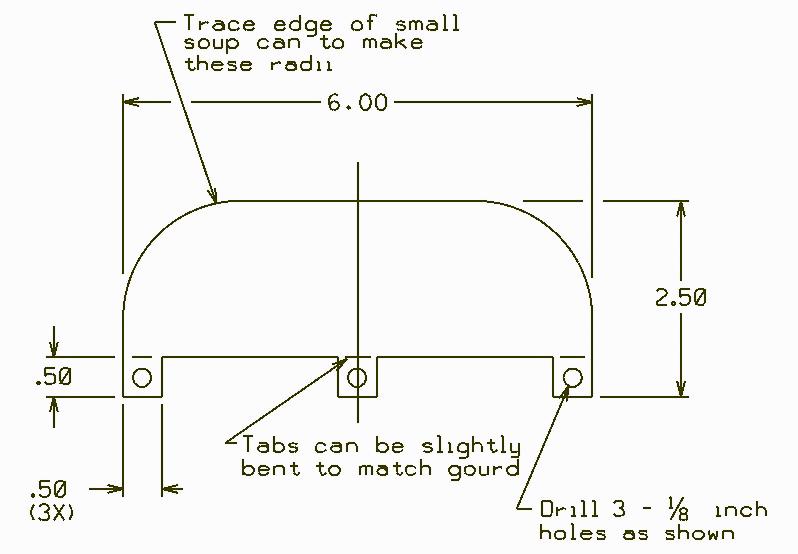
The following sketch depicts the dimensions for a plastic canopy that I use. It's made from the bottom part of the jar that I took the top off of when I added the access holes to my gourds. It's extremely lightweight and very easy to make with just a pair of scissors and a 1/8th inch drill. It's very flexible and easy to work with and once screwed in place, it can be caulked as shown above and it works just as good as the harder to make aluminum.
On to the Painting
Page
Back to the Gourd
Page
Back to Chuck's Purple Martin
Page
This page created
and maintained
by Chuck Abare

|

 1999 -
All Rights Reserved 1999 -
All Rights Reserved
| |