Purple Martin Pages
![]() Requirements for martins
Requirements for martins
![]() The Martin Bio
Page
The Martin Bio
Page![]() The Habits
Page
The Habits
Page![]() Tips to
Attract Them
Tips to
Attract Them
![]() Nest
Checks
Nest
Checks
![]() T-14
Mounting
T-14
Mounting![]() Purple Martin
Housing
Purple Martin
Housing
A Simple Predator Guard
NOTE: This page is loaded with pictures and may take some time to load, so please be patient.
Purple Martins have many predators and one of the last things we think about in a colony is a predator guard on the pole to protect them. The average landlord hardly gives it a second thought that critters like snakes or raccoons or even the friendly squirrel can climb a metal pole to get at the martins. And, why would they want to get up there in the first place? Well, there are a numbers of reasons.
First, there's the eggs. All of the above mentioned love freshly laid eggs. All will gladly suffer the perils of climbing the pole to get at some fresh martin eggs. And, all three can easily climb that metal pole and will do so before even being noticed by the landlord.
Second, the young birds. 'coons and snakes love tender young birds. It makes for a very enjoyable meal to just sit in one place and dine on helpless baby birds that can't get away.
And third, the adults. Yes, even the adults are at risk. If a snake or 'coon happens to surprise and corner a martin in their compartment, then there is no escape for them either. Both will readily consume the adults.
Now, with that being said, it is recommended by all the experienced landlords that ground based predator guards be placed on your poles. The kind and style you use are up to you, but the following is just a simple one that can be made right in your own shop or garage using only the most basic of tools.
First, there are a few basic tools that are very handy to have around the home and I'd like to take a moment to show a few of these. Just about everybody has the everyday tools such as a drill motor and some bits, a jigsaw hammers and screwdrivers. However, there are a few others that come in extremely handy if you get into the purple martin hobby. Now, if you don't have them all, then don't fret. All are not necessary, but they sure do make doing little projects like these super easy. Plus, they also come in very handy on other things around the house.
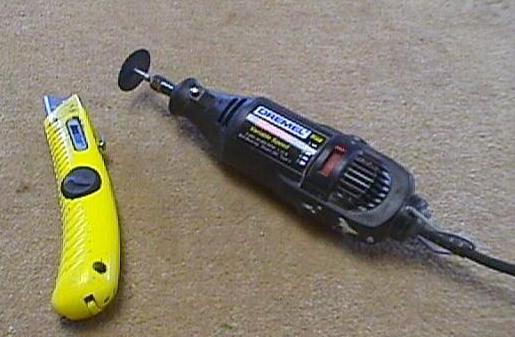
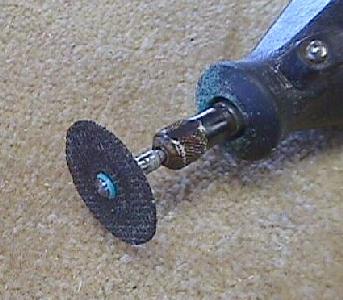
The first are the utility knife and the Dremel tool. These two cutting tools are a necessity and make cutting all kinds of material a breeze. Just keep a good sharp blade at the ready and the utility knife will quickly show it's worth the very first few times you use it. Not everyone has a Dremel tool, but I can promise you, they are worth every penny it cost to get one. I use mine constantly and not just on martin stuff, but on everything that needs a small cutting power tool. There are a number of different brands of these tools, however, if possible, get one that has the variable speed. Sometimes that slow speed comes in real handy for fine work.
I use these little cutting disks all the time. They are fantastic for cutting plastics and wood, even some metals
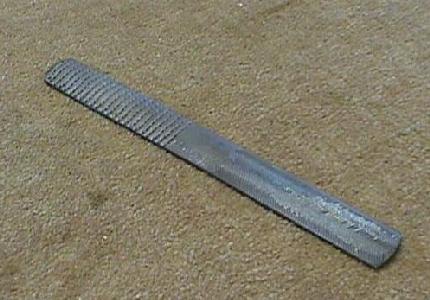
A small wood rasp comes in very handy. They are invaluable for cutting the curves of a Crescent or even the new Excluder should you decide to undertake that kind of entrance hole.
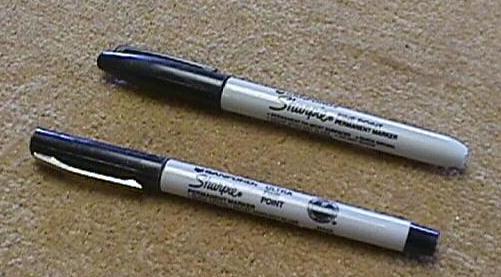
Sharpies, both the thick and fine. I use them to mark materials all the time and are one of the few pens that will write on glass and plastic. I even use the real thick ones to write the numbers on my gourds.
The Guard
Now, let's get started on making that predator guard.
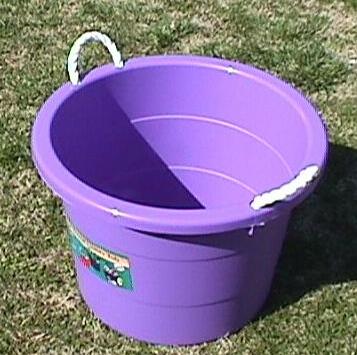
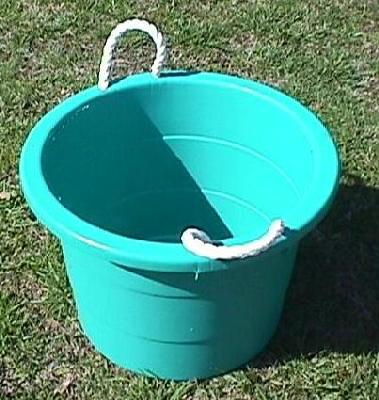
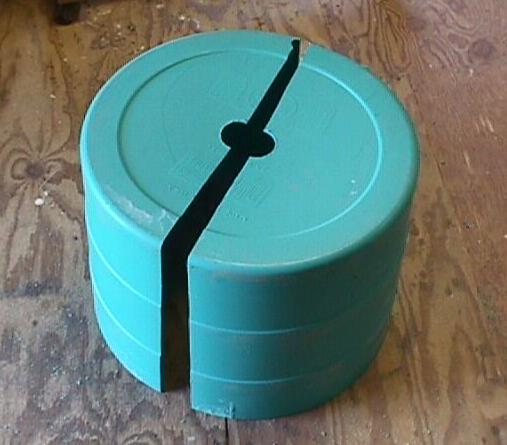
Everybody's seen these little bucket shaped bins in K-mart and Wal-mart. They can be used for just about anything. Toy bins for the kids, plant pots, storage bins and yes, even predator guards. They come in a ton of colors and you can choose the color you want if you decide to be colorful or you can even choose white. They are made from polyethylene and are fairly sturdy.
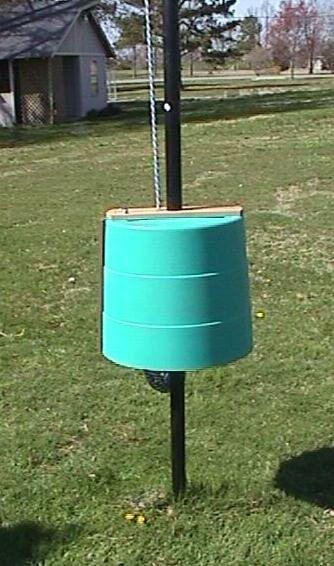
This green one is going to become the subject for our predator guard.
First, we have to remove the top and handles. This is easily done with a Dremel tool with the cutting disk attached.
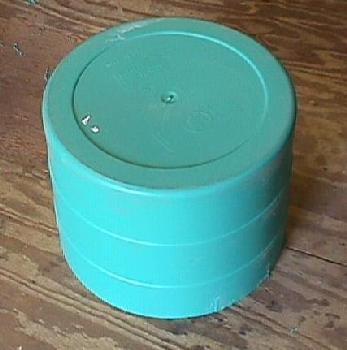
After removing the top and handles, use your small wood rasp and clean up the cut edges. Makes for a much smoother and cleaner job. When you get done, turn it upside down. As you notice, there are no gripping points for any predator to get a good purchase so it's just about impossible for a critter to get around this item once mounted to a pole.
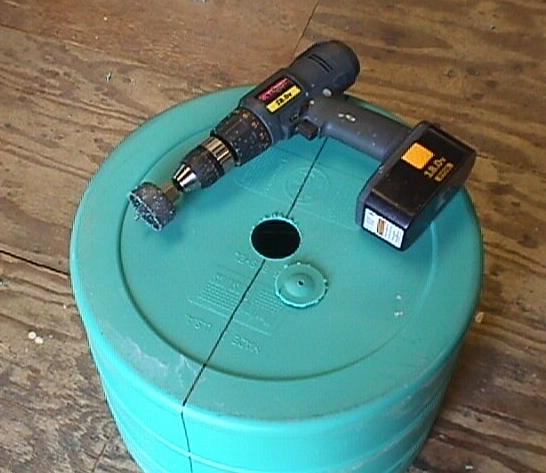
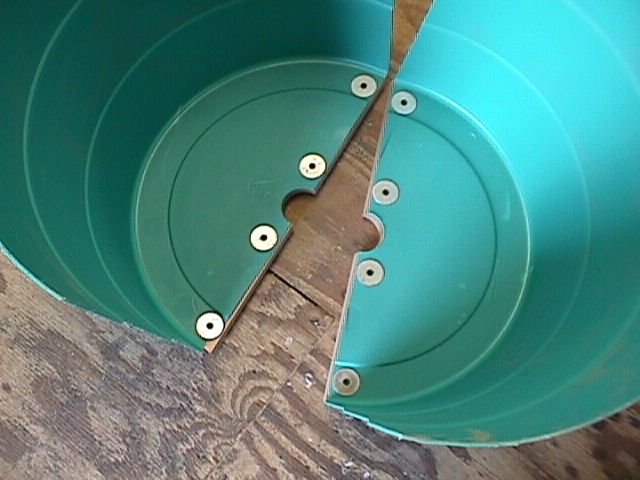
First, we have to find the center of the bin. To do this, use a straight edge and draw a line across the center mark of the bottom. Then, using a square, draw a vertical line on either side. If you don' t have a square, use a board with a square edge or even a pad stood on end.
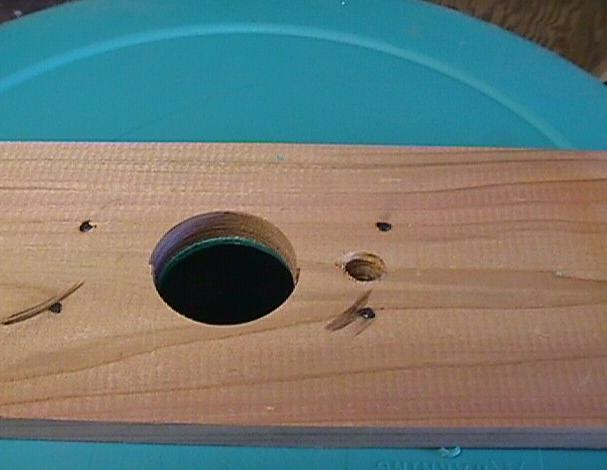
Next, using a 2" hole saw, cut a hole in the dead center of the bin. If your pole is of a different size, this hole has to be 1/8" bigger than your pole.
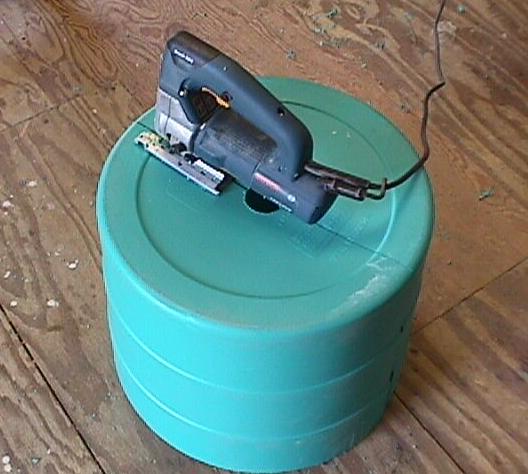
Next, carefully cut the bin in half following the lines you drew. Go slow. The material will split if you try to cut too fast. The warmer the bin is to start, the easier it is to cut. And yes, the Dremel tool will work just fine to cut it in half.
This is what it looks like cut in half.
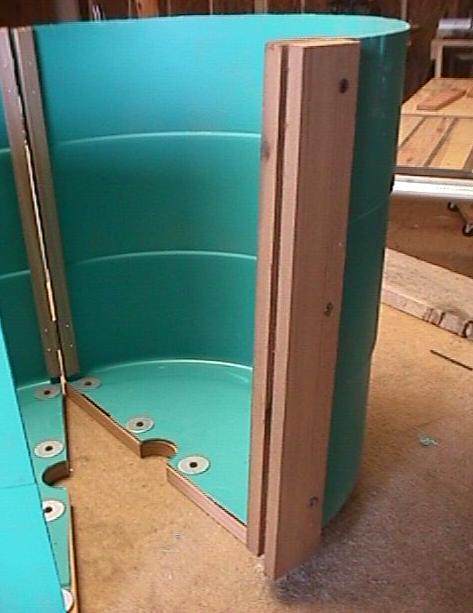
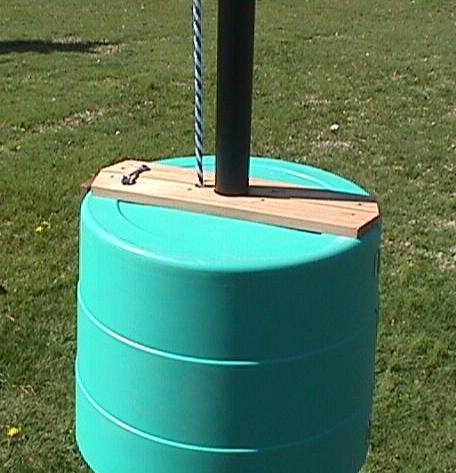
The first thing you have to do is strengthen the edges. This is done by adding a couple of strips of wood to the bottom This could also be a complete disc of wood covering the entire bottom of the bin.
I then added some large fender washers to the inside to screw the boards on. The washers give a lot more area coverage and thus, a lot more strength to the unit.
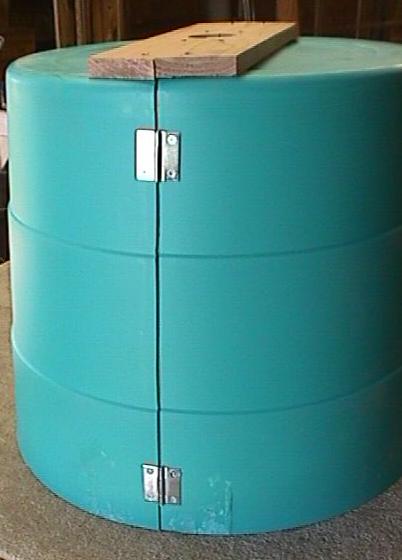
At this point, I added a couple of 1 1/2" hinges to one side of the bin. This allows the hinging of the unit to get it on and off the pole...
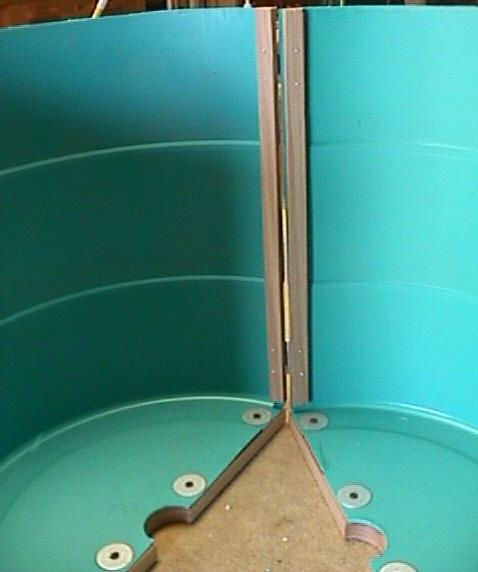
I put a couple of strips of wood on the inside to screw into it. They also add to the strength of the unit.
On the opposite side of the unit, I added two strips of boards. These created a groove to slide the other side into when it is closed.
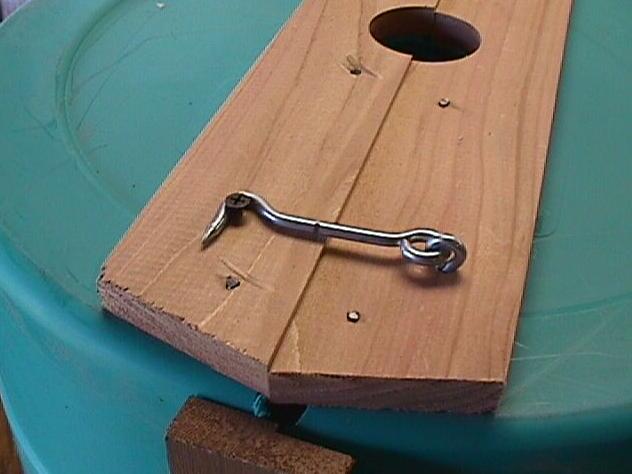
The lock is nothing more than just a screw and a screen door latch... Let's keep things as simple as possible.
I then drilled a hole beside the main hole to allow the passing of the rope when it's put on the pole.
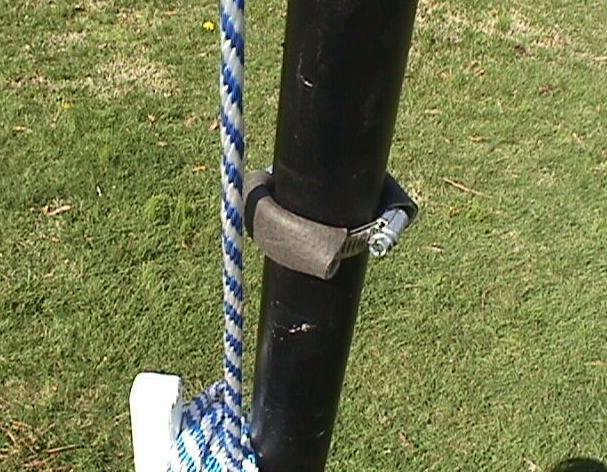
Next, you'll need to scrounge up about 6 inches of old garden hose. Add it to your pole using a hose clamp as shown. This is what you will set your guard on. Yes, this will allow it to flop all around. That's the idea of it. The flopping and moving around of the guard makes it just about impossible for critters to get any kind of purchase on it and if they don't feel safe, they won't attempt to climb it.
Finally, add your guard to your pole as shown. If you don't like the color, then a simple can of spray paint will fix that. Try one. See what you think. You'd be surprised at how easy they are to make.
One more thing. These can be make from any kind of large container like this. A garbage can will work wonders. One thing. Just make sure you remove any and all hand and foot holds. There should be no grasping points of any kind.
They work. If you have ground based predator problems, then here's one solution...
Back to Chuck's Purple Martin
Page

|


 1999 -
All Rights Reserved
1999 -
All Rights Reserved